On this page
Open the settings
You can open the settings from the server list or during a session.
From the server list
- Tap the gear at the top right of the Servers screen.
You do not need a connection for this. Thus you can change the general settings and buy or restore Ilopad Pro before you pair a server.
During a session
- If the toolbar is hidden, tap the tab at the top right corner of the screen. In gamepad mode, the tab is at the top center. VoiceOver calls it Show toolbar.
- Tap the gear (Settings) in the toolbar.
On a narrow screen, the toolbar has no space for the gear. Then tap the round button with three dots, and tap Settings in the menu. VoiceOver calls this button More controls.
The settings open on the page of the mode that you use. Gamepad mode has no settings page, so from gamepad mode the settings open on the main screen.
Move in the settings
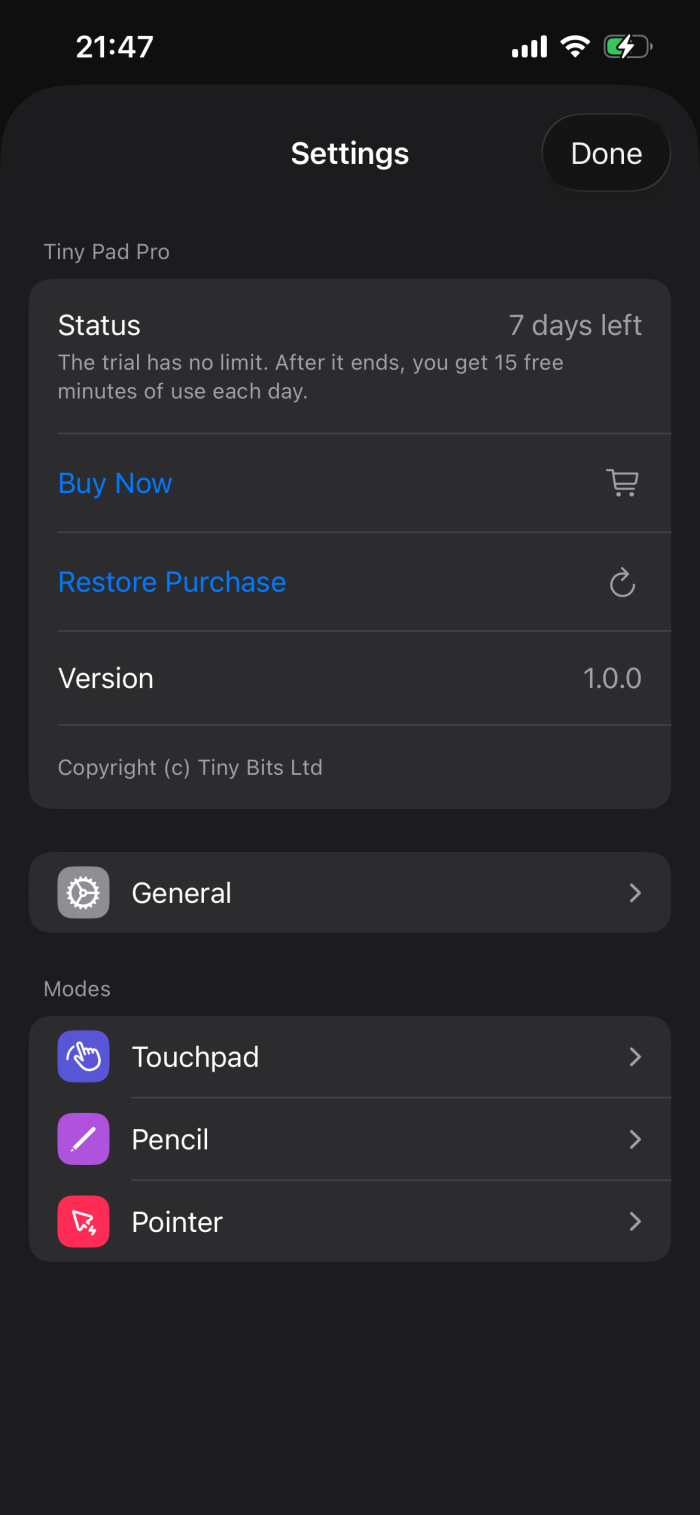
The main screen of the settings has three parts:
- Ilopad Pro: the trial or purchase status, Restore Purchase, and the version. See Ilopad Pro and the trial.
- General: the settings for all modes. See General settings.
- Modes: one page for each of Touchpad, Pencil and Pointer.
Tap a row to open its page. Tap the back arrow at the top left to go back to the main screen. Tap Done at the top right to close the settings.
Change the mode
The mode button is the colored button near the right end of the toolbar. It shows the icon of the mode and a down arrow. When the screen is wide, for example on an iPad in full screen, it also shows the name of the mode.
- Tap the mode button.
- Tap Touchpad, Pencil, Gamepad or Pointer.
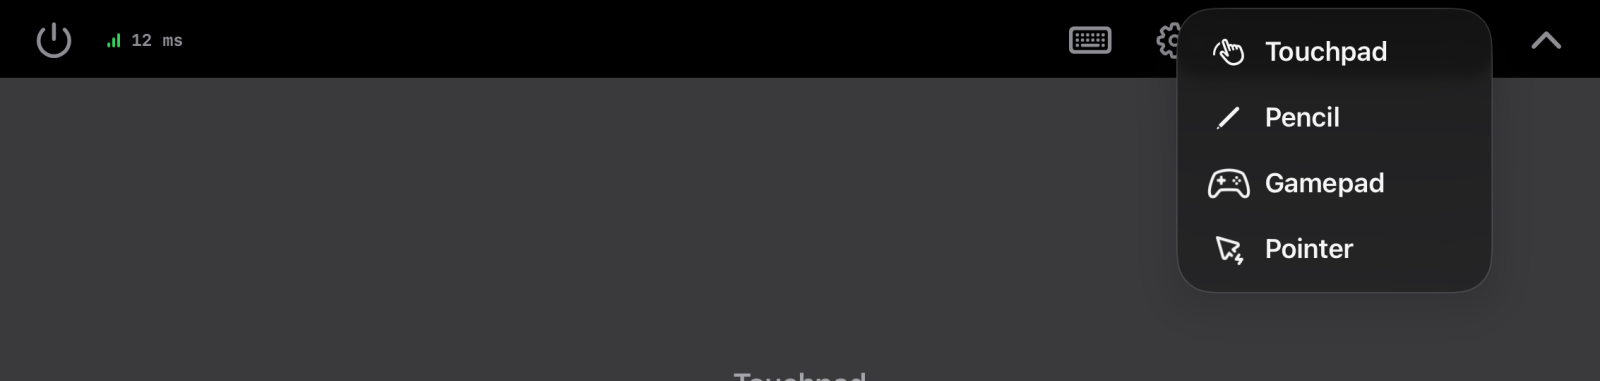
Some servers cannot operate a game controller:
- A macOS server cannot operate a game controller. The menu then does not show Gamepad.
- If the server needs a driver first, the menu shows Gamepad. When you tap it, the app tells you why the mode is not available and offers the driver installation. See The Windows driver.
After you start the app, the first connection opens in touchpad mode. Until the app closes, each new connection opens the last mode that you used.
The app has no orientation setting. Each mode sets the orientation that it needs. On an iPhone, pencil mode turns the screen to landscape and pointer mode turns it to portrait. Touchpad mode and gamepad mode follow how you hold the device.
General settings
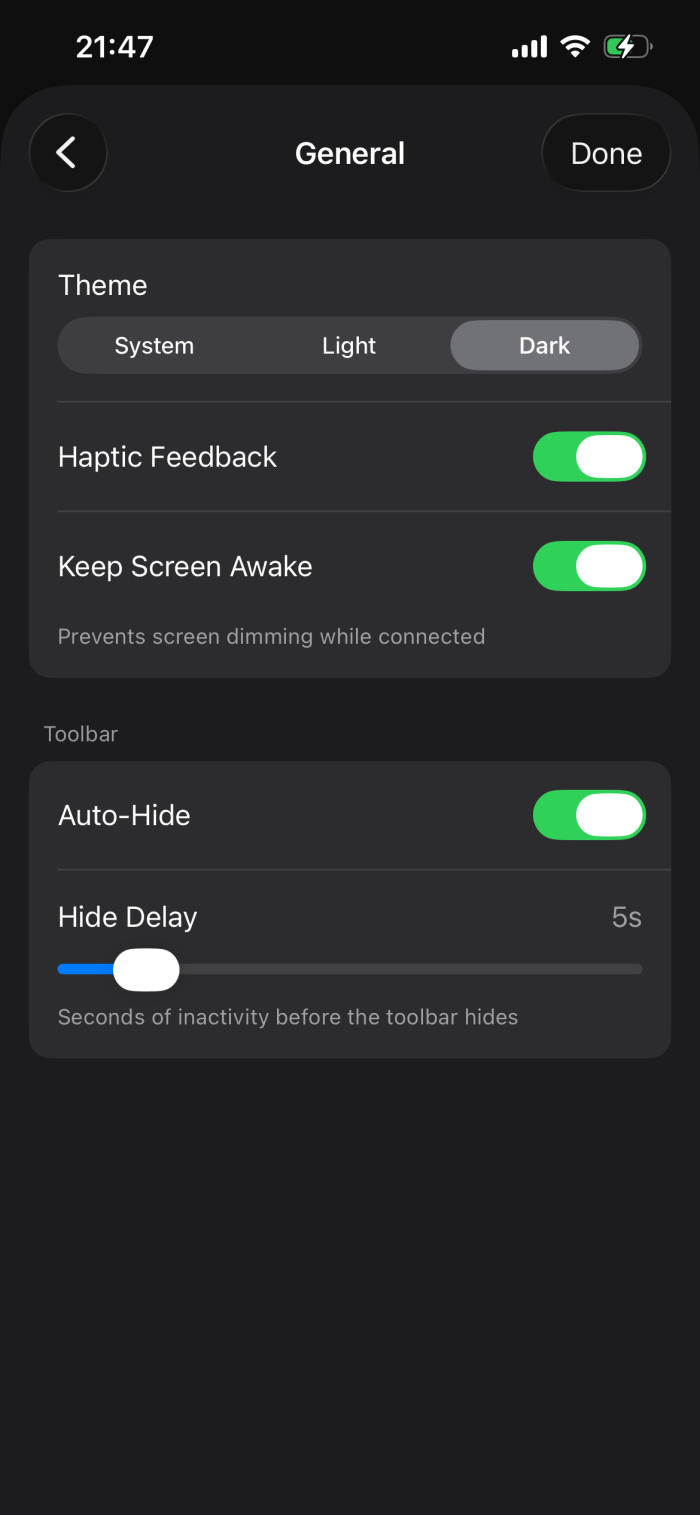
These settings apply to all modes and to all servers. The app keeps them on the device. They are on the iPhone and on the iPad.
Open them from the main settings screen: tap General.
| Setting | What it does | Default |
|---|---|---|
| Theme | Sets the colors of the app. System follows the light or dark appearance of the device. Light and Dark keep the app in one appearance. The theme of the server on the computer is a different setting. | Dark |
| Haptic Feedback | Lets the device vibrate lightly. Examples: a click on the touchpad, a button press, a change of mode, a completed connection, a scanned pairing code. | On |
| Keep Screen Awake | While you are connected to a server, the screen does not dim and the device does not lock. When the session stops, the usual Auto-Lock setting of the device applies again. | On |
| Auto-Hide (in Toolbar) | Hides the toolbar of the mode when you do not touch it. To show it again, tap the tab at the top of the screen. The toolbar does not hide while the settings are open or while you edit a layout. | On for iPhone, off for iPad |
| Hide Delay (in Toolbar) | The number of seconds with no touch on the toolbar before it hides. From 2 to 30 seconds. You see this setting only when Auto-Hide is on. | 5 s |
The toolbar also has its own hide button at its right end. When you hide the toolbar with this button, it stays hidden until you tap the tab at the top of the screen.
Settings for each server
Some settings depend on the computer screen and on where you sit. Thus the app keeps a different value for each server that you paired. When you connect to a server, the app loads the values for that server.
| Setting | Page | Default for a new server |
|---|---|---|
| Sensitivity | Touchpad | 1.5 |
| Absolute Pointing | Pointer | Off |
| Horizontal Sensitivity | Pointer | 30 with Absolute Pointing off, 20 with it on |
| Vertical Sensitivity | Pointer | 15 with Absolute Pointing off, 35 with it on |
Pointer mode keeps one pair of sensitivity values for each way of pointing. The page shows the pair for the way that is on. When you calibrate the aim in pointer mode, the app writes the new values for Absolute Pointing for that server, and turns Absolute Pointing on. See Calibrate the aim.
Why these settings need a connection
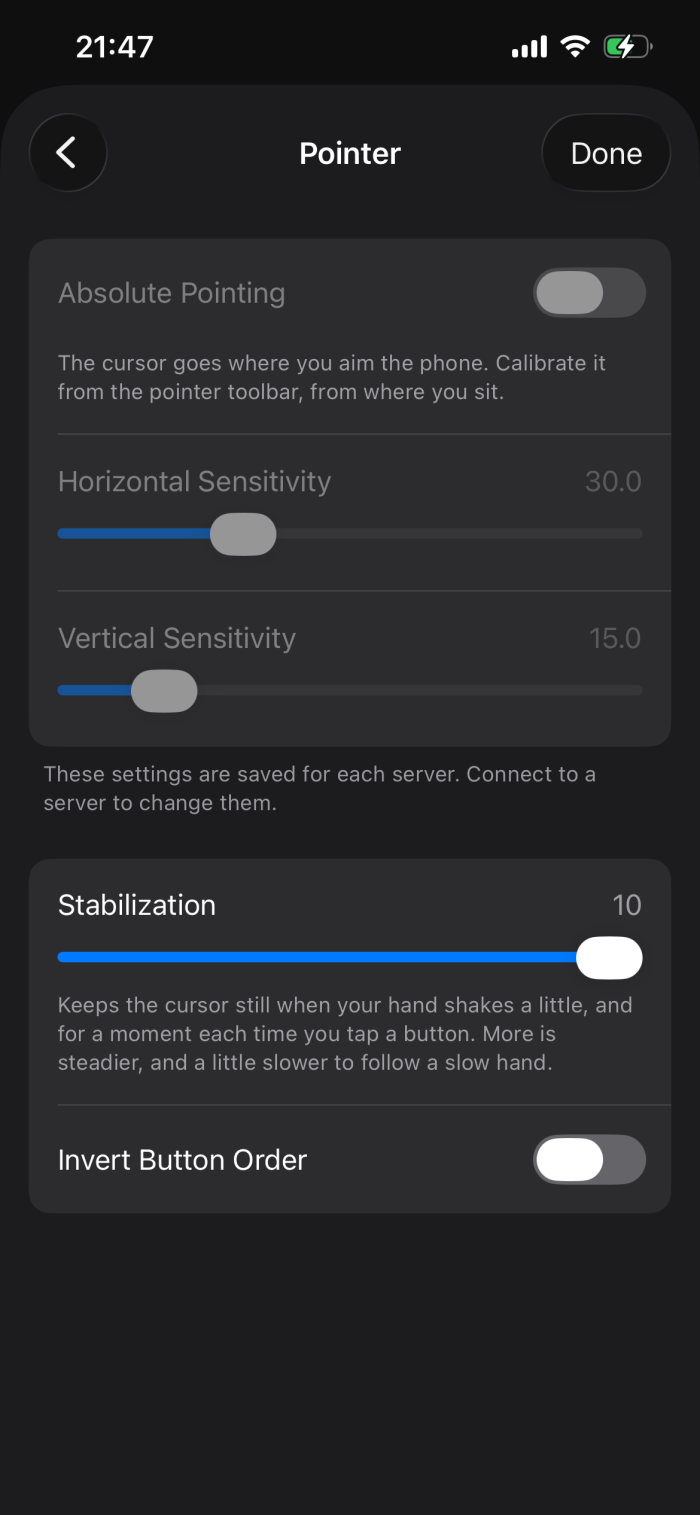
The app keeps each value under a server. When you open the settings from the server list, no server is connected. Then the app cannot know which server to change. Thus it shows these settings dimmed, and you cannot change them. Below them, a note says: These settings are saved for each server. Connect to a server to change them.
When you tap a dimmed setting, the note flashes two times to show you why the setting is off. With VoiceOver, the dimmed setting tells you to connect to a server.
Change a setting for one server
- Connect to the server.
- Tap the gear (Settings) in the toolbar.
- If the page of the mode does not open, tap Touchpad or Pointer.
- Move the slider or tap the switch.
- Tap Done.
The change applies only to the server that you are connected to. The app keeps it after the session stops.
The other settings on the Pointer page, Stabilization, Click Hold, Scrolling and Invert Button Order, apply to all servers. You can change them without a connection.
Settings of each mode
The chapter of each mode tells you about its settings:
- Pencil mode settings: see Pencil mode.
- Touchpad mode settings: see Touchpad mode.
- Pointer mode settings: see Pointer mode.
- Gamepad mode has no page in the settings. See Gamepad mode.
Ilopad Pro and the trial
Ilopad Pro is a one-time purchase in the app. The server on the computer is free. It has no trial and no purchase.
How the trial works
| Period | What you get |
|---|---|
| The first 7 days after you install the app | All of the app, with no limit and no reminder. |
| After the 7 days | 15 free minutes of use each day. After the free minutes, a Buy Ilopad Pro reminder appears. It appears again after each 10 more minutes of use. The app continues to operate fully. |
| After you buy Ilopad Pro | No limit and no reminder. |
The app counts the time while it is open on the screen, with or without a connection. The count starts again at midnight, local time.
To close the reminder, tap Maybe Later or swipe it down.
See the status
- On the Servers screen, a label next to the gear shows the days that are left, for example 7 days left, or Trial expired. Tap it to open the purchase screen. After the purchase, the label goes away.
- In the settings, the Ilopad Pro card shows Status. The value is the days that are left, the days since the trial ended, or Purchased. The text below the value explains the status, for example the free minutes that are left today.
Buy Ilopad Pro
- Open the settings.
- In the Ilopad Pro card, tap Buy for and the price. If the App Store has not sent the price yet, the button shows Buy Now.
- Confirm the purchase in the App Store window.
You can also tap Buy for on the reminder, or on the purchase screen that opens from the label on the Servers screen.
When the purchase is complete, Status shows Purchased, and the two buttons go away.
Restore the purchase
Use this after you install the app again, or on a second device with the same Apple ID.
- Open the settings.
- In the Ilopad Pro card, tap Restore Purchase.
The reminder and the purchase screen also have Restore Purchase.
A purchase that Family Sharing shares with you also unlocks the app.
Messages
| Message | What it means and what to do |
|---|---|
| Purchase pending | The purchase needs approval, for example from a parent. Ilopad Pro unlocks when the approval arrives. You do not need to do anything. |
| Store unavailable | The app cannot get Ilopad Pro from the App Store. Make sure that the device has an internet connection, then try again. |
| Purchase failed | The App Store did not complete the purchase. The message gives the reason from the App Store. |
| No purchase found | The Apple ID on the device did not buy Ilopad Pro. Sign in with the Apple ID that bought it, then try again. |
| Restore failed | The App Store did not restore the purchase. The message gives the reason from the App Store. |
If you cancel the App Store window, no message appears.
Version, help and privacy
- Version: the last rows of the Ilopad Pro card show the version of the app and the copyright. Give the version when you ask for help.
- Help: the app has no help screen. Use this manual, and the Support page to contact us.
- Privacy: the app has no privacy screen. Read the Ilopad App Privacy Policy.
- Reset: the app has no command that resets all settings. To set a value back, change its control. To remove a server and its settings for each server, delete the server. See Remove a device or a server.